With Unbounce Google Ads conversion tracking, businesses can easily understand how well their campaigns are performing. It helps measure which keywords and campaigns generate leads through ads and amps up your lead generation game.
Through Unbounce conversion tracking, it becomes easier to follow the conversion rate of marketing efforts. But for beginners, setting up the tracking can get a little complicated. So in this blog, I will explain how to set up Unbounce Google Ads conversion tracking.
Although I am using Unbounce here, the same principle can be applied to any Content Management System (CMS) like WordPress or any other landing page builder tool.
Make sure you take advantage of this exclusive deal: Get a 20% discount on your first three months, or save 35% on your first full year with Unbounce. Start today and give your lead generation efforts a powerful boost!
What is a Conversion on Google Ads?
In the context of Google Ads, a conversion is an action that a user takes on a website after clicking on an ad. Examples of conversions include making a purchase, filling out a contact form, or signing up for a newsletter.
Google Ads allows users to track conversions by placing a small piece of code, called a “conversion tracking tag” on their website, which reports back to Google Ads when the desired action is taken.
Users can then view reports in Google Ads to see how many conversions their ads have generated and use that information to optimize their campaigns.
How Conversion Tracking Works?
When a user clicks on an ad and completes the desired action on the website, the conversion tracking tag sends a notification to Google Ads, which records the conversion.
This process allows advertisers to see how many conversions their ads have generated, as well as additional information such as the value of those conversions, the conversion rate metric, and the cost per conversion.
This information can be used to optimise ad campaigns by testing different ad variations or targeting different groups of users and improving performance.
How do You Set Unbounce Google Ads Conversion Tracking?
1. Define a Conversion
The definition of conversion can vary depending on your marketing goals. A broader definition of conversion is to get a web page visitor to perform an action. The action can be anything that moves the lead into the sales funnel.
To make it easier, let’s define our conversion goal: Generate a lead. For a visitor to convert into a lead, the visitor goes through the following stages:
- Comes to the landing page
- Fills out the form
- Moves to the thank you page
So let’s define a new conversion.
On your Google Ads dashboard, click the spanner icon (tools) > Measurement > Conversions.
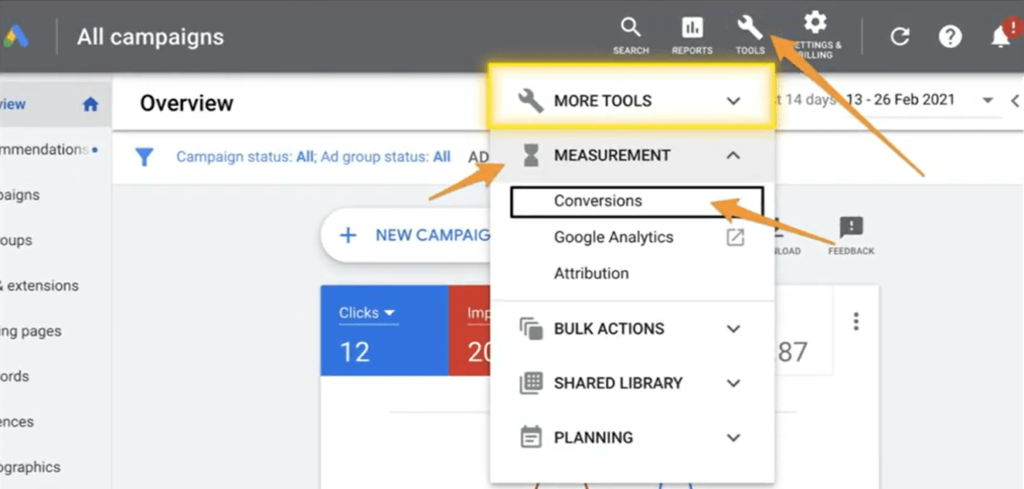
Click the + blue button here.

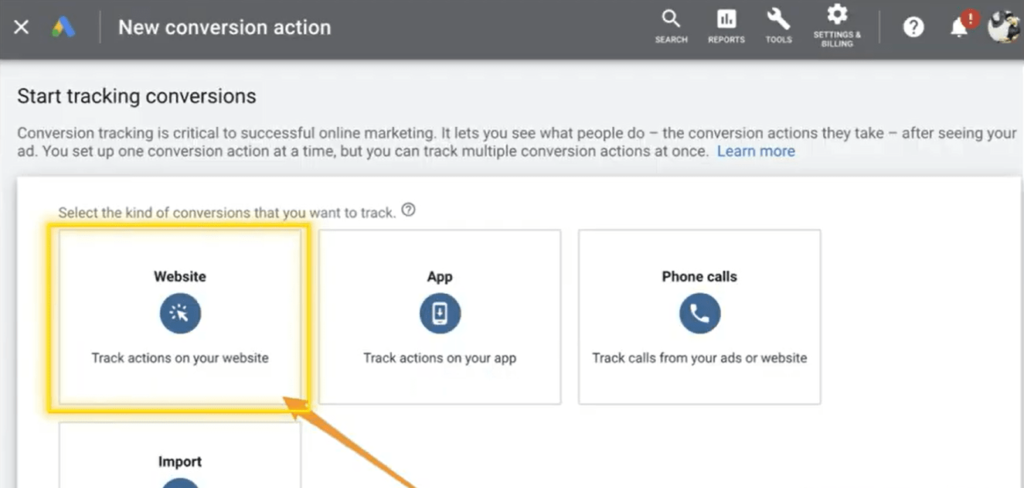
Next up click the website.
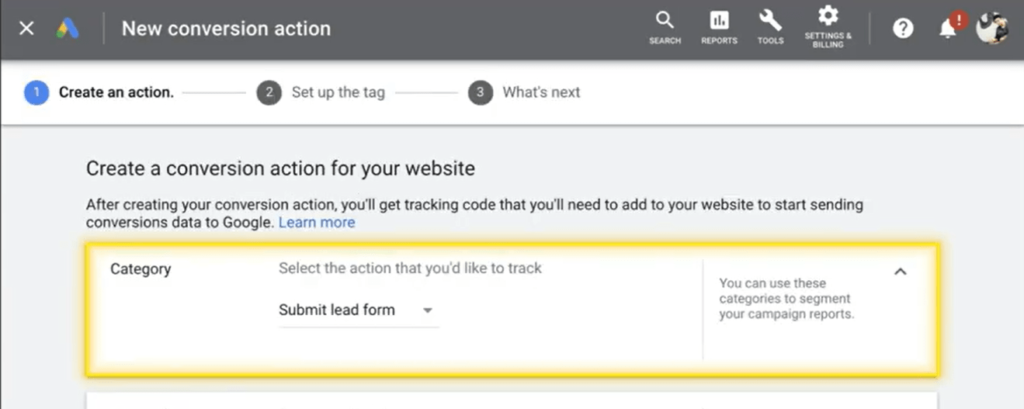
In the category, choose – Submit Lead Form.
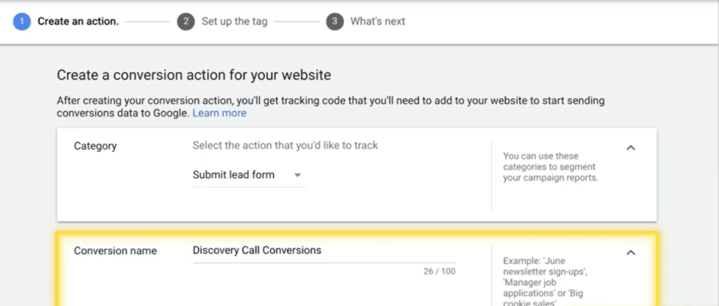
Give it a name that will help you distinguish it. In my example, I called it ‘Discovery Call Conversions’.
For value, you can set to the first option and set a simple value of $1 or £1.
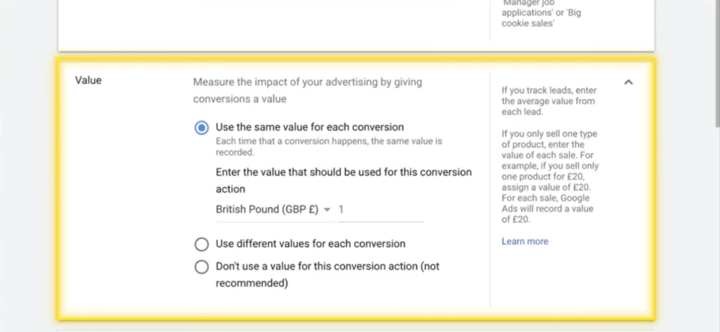
For the rest of the settings, I usually leave them as is.
Once you made these changes, click Create and continue.

Next up click the first option – install the tag yourself.
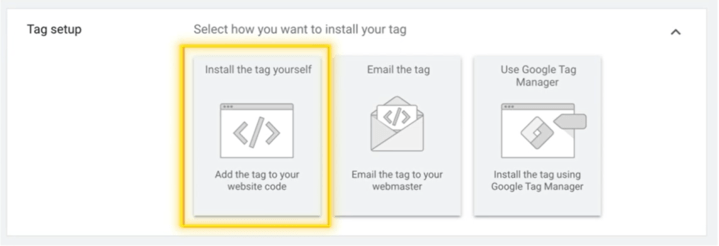
You will notice two script blocks.
- The first one is the global site tag. This tag helps Google keep track of who visited your website or landing pages. So we will apply this on all pages.
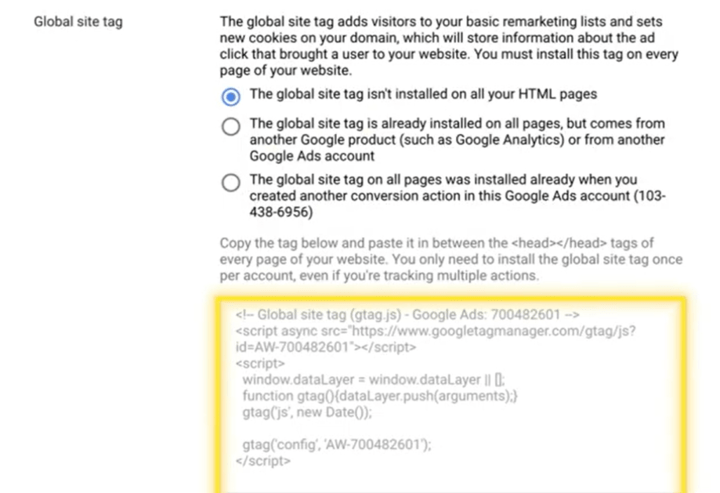
- The second snippet is the conversion tracker. This snippet only triggers when the visitor fills out the form on the website and visits the thank you page.
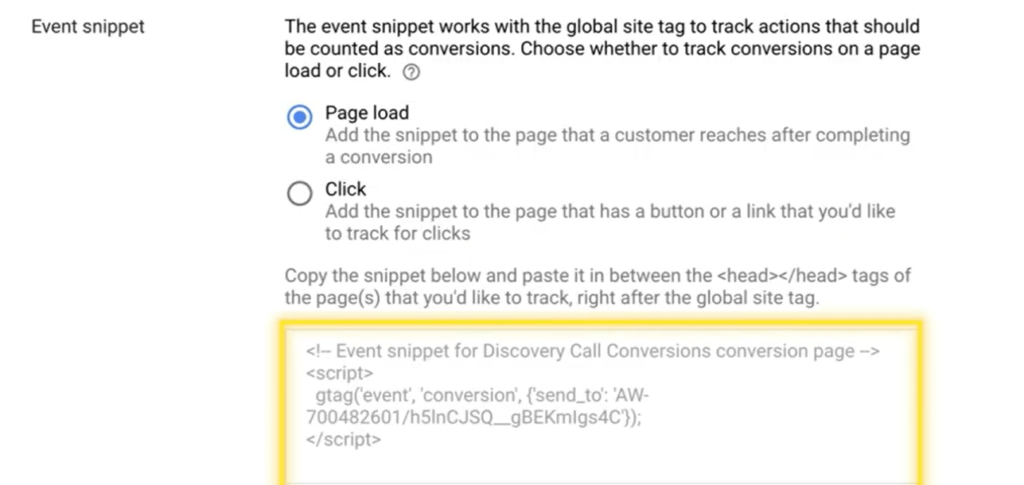
We will shortly copy this script over to our thank you page.
Copy these snippets in a notepad and let’s head over to Unbounce for Google Ads conversion tracking setup.
Where to find tracking code
Login to Google Ads> tools>
2. Setting up Global tracking code in Unbounce
Log in to Unbounce > and head over to settings and then script manager.
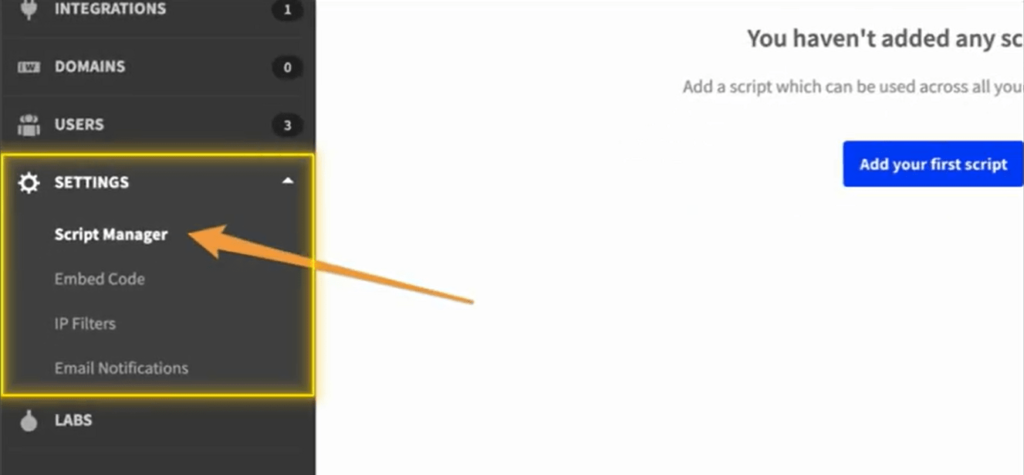
Click Add a script button.

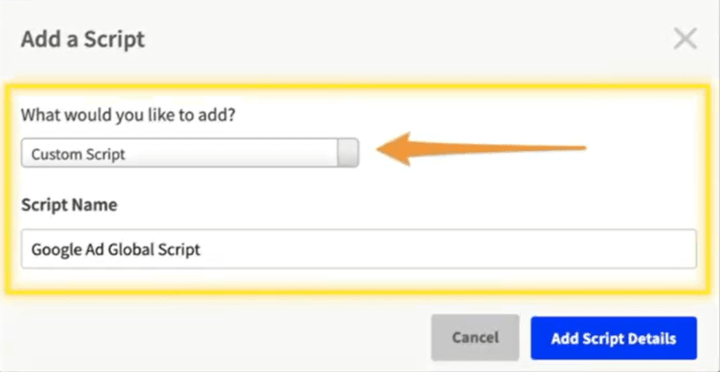
Now choose Custom Script and name it Google Ads Global Script.
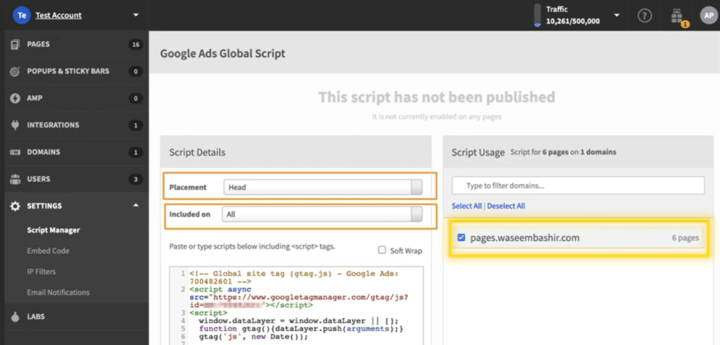
Now on this screen, you need to first select the placement as Head. Then choose ‘All’ for included on, as we want the script to load on all pages. Copy the global script from the notepad and paste it here. And finally, apply the script to your landing page’s domain setup and click Save and publish script.
3. Apply Code: Thank You Page
As we have now installed the first snippet, we now need to set up the conversion script on the thank you page.
Head over to your thank you page and click edit.
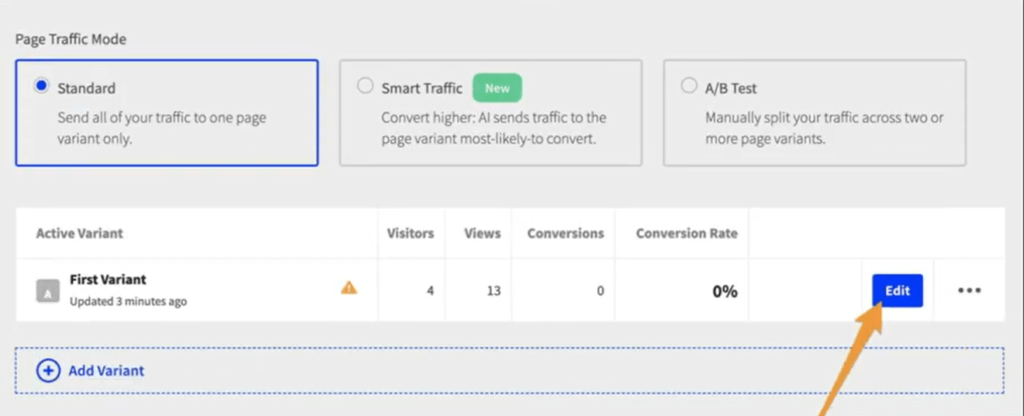
In the menu below, click Javascripts and +Add New Script.
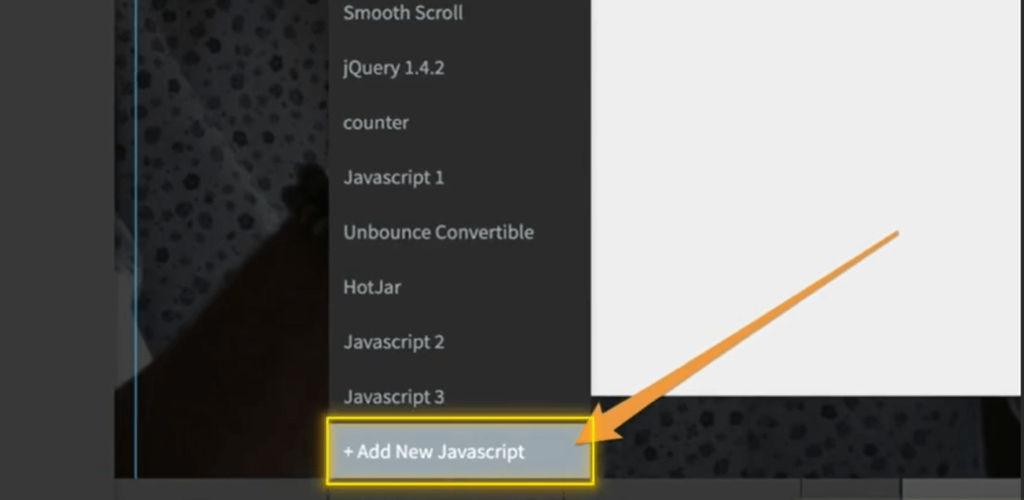
Now here, choose a script name – e.g. Google Ads Conversion Code, choose Head as the placement, and then paste the 2nd script and click done.
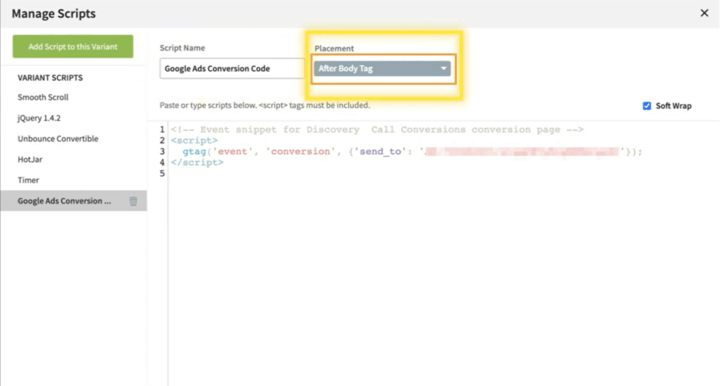
Save and publish the page.
4. Success
That should do it, guys, you should now be able to see conversion in your Google ads account. However, in case you don’t see any numbers showing up when you get leads, then you can use Tag Assistant to verify if the scripts are in the right place.
To debug go to tag assistant website
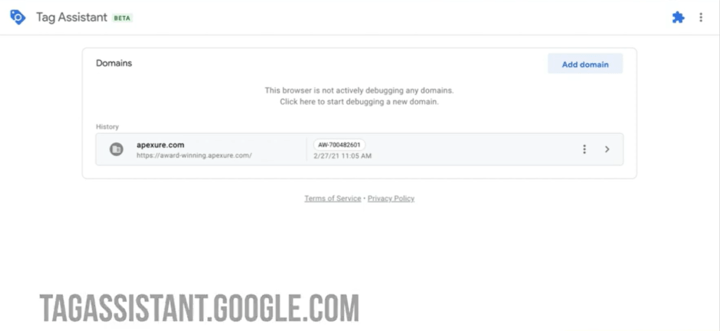
Click Add Domain.
Paste the URL of your landing page.
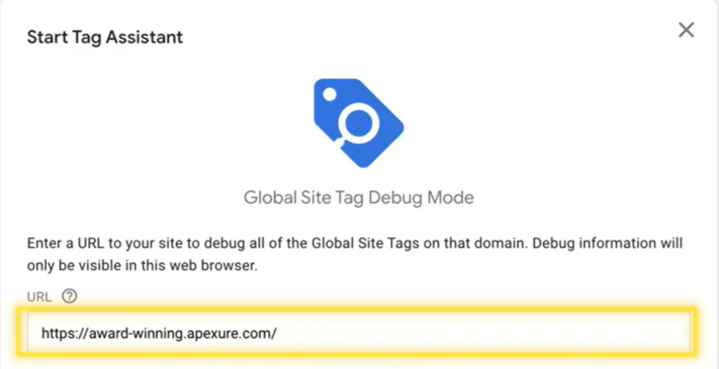
When you click start, it will open the page in a new tab.
Head over to the other tab which should say – Tag Assistant Connected.
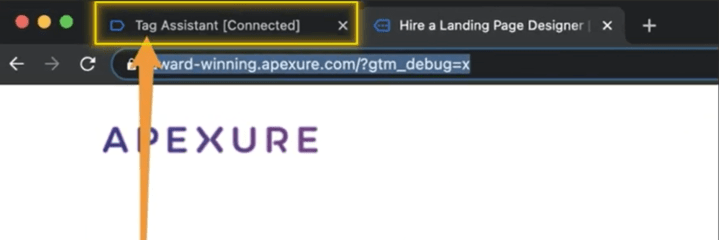
Here click Continue.
And now you should be able to verify if your Google Ad script is fired on page load.
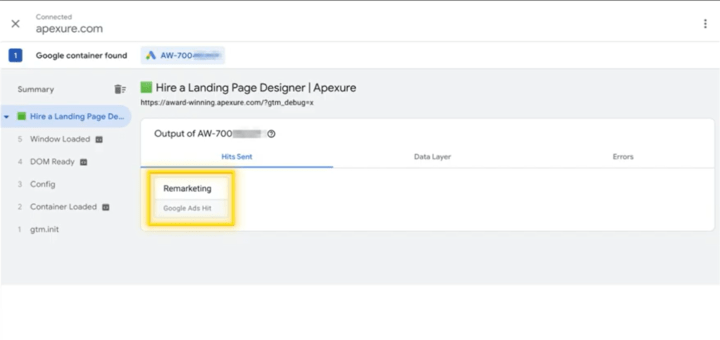
You can repeat this process for the thank you page.
On your thank you page, you should see 2 scripts fired.
Please ignore the other tags which you see here, as I am tracking quite a lot of stuff on our thank you page.
Ending Note
Setting up an Unbounce Google Ads Conversion Tracking system is a must if you are looking forward to building a solid marketing ecosystem. Metrics like conversion rate is crucial to understand what works for the target audience and replicate it for further success. By incorporating Google Ads UTM parameters into your strategy, you can refine your tracking even further and unlock deeper insights.
👉 Download my free UTM Management Template to streamline your campaign tracking and never lose sight of what’s driving results!
If you found this blog useful please share this with your other marketing friends.
Also, Check:
13 Types of Landing Pages
Landing Page vs Web Page: What’s The Difference?
How to Build an A/B Testing Framework In 7 Steps?
Guide To Build An Automated Funnel
Unbounce vs Webflow: Comparing Top Marketing Platforms

%20(1).webp)
